Monday, May 16, 2011
Last Post
I will no longer be posting to the blog. I am starting a new one that will more acurately reflect the path our lives are taking.

Friday, April 8, 2011
Michael Bunker
I will write more on this later, but I wanted to link to the trailer for the book "Surviving Off-off Grid" written by Michael Bunker. Click on the title to be taken directly to the trailer.
Wednesday, March 9, 2011
Squeezin The Juice
What the hell!! I've been buying gallons of organic orange juice when I've got a frigging orange tree in the back yard. For quite a long time, I've dismissed the orange tree as a nuisance, somtheing to be dealt with. The fruit would fall to the ground year after year, requireing clean up. I had never tried to eat the fruit, having been told by more than one person that the oranges from the tree were sour and not fit to eat. What a suprise then, when I finally decided to see for myself! The ripe fruit is sweet, juicy, delicious, hands down the winner over store bought for the financial savings alone!!
I picked up a trillium juicer at Sally's on half off day for $2.50. It looked brand new, in the box and all the parts were wrapped in plastic. SCORE! The master plan was to juice every last orange on the tree. Since then I found this Granny Miller video and realized I should can some of these wonderful oranges. That will be the next task.

I picked up a trillium juicer at Sally's on half off day for $2.50. It looked brand new, in the box and all the parts were wrapped in plastic. SCORE! The master plan was to juice every last orange on the tree. Since then I found this Granny Miller video and realized I should can some of these wonderful oranges. That will be the next task.
All members of the family were enlisted for this job. No one was coerced and no husbands were injured in the making of this juice.
The girls and I picked bushel after bushel of oranges. After picking over 100 oranges, I decided to get through what we had before picking any more. We brought the oranges in from in sacks, about 20 at a time so the girls could carry them. Freya washed and rinsed the oranges while I peeled them. All the peels and pulp went into the compost after we were done.


Bella and Dad put the oranges through the juicer, its not the most efficient juicer but it ROCKS for $2.50! After letting it settle for a while, Freya scooped out the pulp. Or as she calls it, "The Gulp".

We worked all day, the girls were really into it and couldn't wait to drink their own homemade orange juice. At last, after about 4 hours we were done and the girls went out to play while Scott and I did the clean up. I don't think this juice will last us all year, but it will definitely put a dent in our grocery bill!
The big problem we are running into is space. There is not a lot of space in our freezer....and 20 bags of frozen OJ takes up a lot of room. Another reason to buy a deep freeze!!
Can You Dig It?
I am never more content with my body than after a days work outside in the garden and all that tending to it entails. Hard work, physical work, honest work makes me feel......relaxed in my body like no other work can.
Today was coop cleaning day. This job is a process and cleaning the coop itself isn't even the first step.
The first step is to remove the layers of hay off all the beds in the front yard. I have tried planting cover crops for overwintering and it was a serious backfire!
To this day, I am fighting the clover I laid down a couple of years ago. Its called cover crop for a reason! A thick blanket of it grows over a quarter of the front yard. If I want to plant there, I have to spend an hour bent over, pulling scraping and yanking the clover out.
Next, I empty all the beautiful compost out of the bins. This gets spread out over the front yard beds. It is now that my inner fire is really lit up for Spring! The glorious smell of the compost always gets me going! This is a smell I will never tire of...dark, rich, crumbly soil. Throughout my life, in its darkest moments, my greatest comfort and solace has always come from lying on the earth. Soaking up the heat that comes from the black dirt and filling my nose with the scent of it.

Now at last, it's time to clean the coop. All the cedar shavings and manure get shoveled into the wheel barrow, rolled over to the empty compost bins, and layered in with the aforementioned clover. A good soaking of the mixture gets everything going. I will continue to add to it the normal yard waste and kitchen scraps that the chickens don't eat(which dosn't amount to a whole lot!)
A new layer of cedar shavings go down on the floor of the coop and the freshly scrubbed ladders the chickens use as roosts go back up. Now the coop is done!!
Monday, March 7, 2011
Dandelion Tea

I came this close to buying Dandelion Tea the other day. Truly, I was about to pay money for it. Then I heard my Granna's voice in my head. Cussing me for wasting money on buying weeds. So, I came home and looked it up online and made it myself! I get what I want, save money, and Granna's little voice inside my head is happy. I like to make the voices happy now and then.

I felt a little guilty about keeping these prime dandelion greens to myself (the chickens usually get dibs) but then realized that with the copious amounts of of it growing in our garden, there really was more than enough to go around.
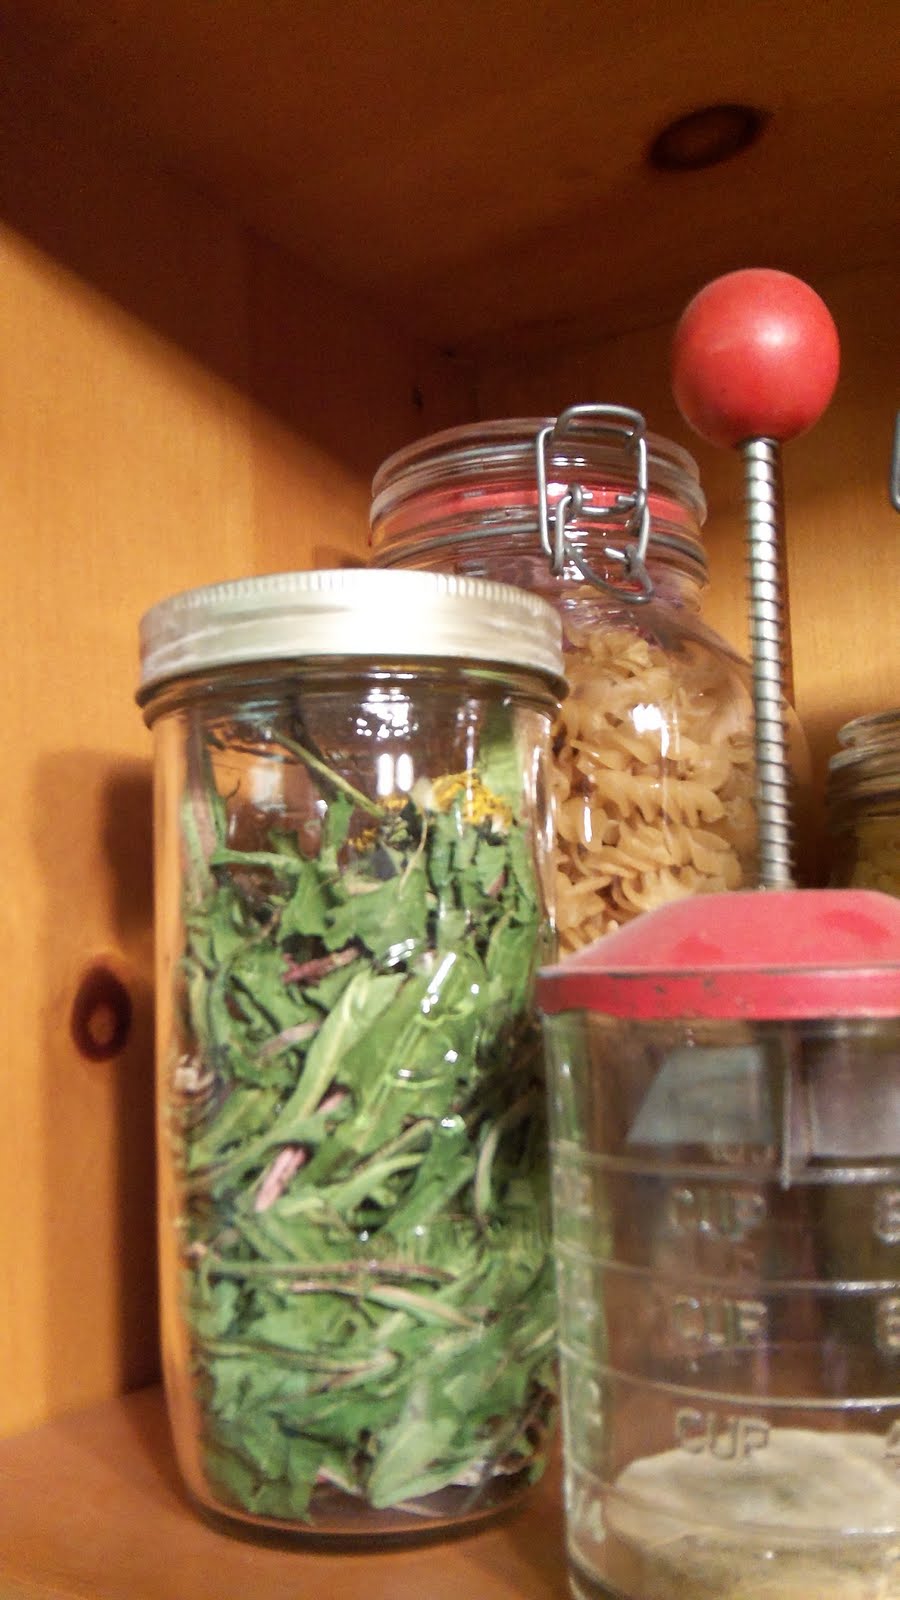
After picking and washing, I layed them out on the drying racks (wonderful and beautiful window screens I bought from a demolition sale for $1 each) and let them set for about a week. Along with the leaves, the tea recipe calls for dandelion roots. I looked at about 10 different recipes and this is what I came up with....
1 tsp. dandelion leaves and root per cup of boiling water.
See how simple!!! Dandelion is likely an excellent digestive aid and is used as a tea to cleanse the liver. But I just like the taste and the fact that its FREE!!

Holy Seed Starts!
This is it! March in California is time to start cookin!!! I am a bit reluctant, however, to over do it. Our family will be vacationing in mid-April and I have yet to find a volunteer to feed the animals every day, let alone nurse along tiny seed starts!!
Planning, however, doesn't need any help to move it along. This year, corn will have its own plot. The girls (our chickens, not our kids) will have to relinquish a bit of the backyard so we can grow a nice sized crop of corn. If only they knew they were the intended recipients, they wouldn't mind.
Then, tons of salad greens, collard greens, beets, tomatoes, carrots, peas and beans. I will be trying broccoli again this year. I've not had luck in the past due to aphids. However, I've lost my fear of using DE on the plants and I'm sure this will do the trick.
I'm cutting back on the summer squash but will still plant a couple of patty pan and crook neck.
This should be the year the blackberries take off. With a little luck we'll be making jam from our own berries this year.
The girls are already in full egg-laying mode, we're getting a dozen eggs every 2 days. We've been having a lot of egg white breakfasts!
Planning, however, doesn't need any help to move it along. This year, corn will have its own plot. The girls (our chickens, not our kids) will have to relinquish a bit of the backyard so we can grow a nice sized crop of corn. If only they knew they were the intended recipients, they wouldn't mind.
Then, tons of salad greens, collard greens, beets, tomatoes, carrots, peas and beans. I will be trying broccoli again this year. I've not had luck in the past due to aphids. However, I've lost my fear of using DE on the plants and I'm sure this will do the trick.
I'm cutting back on the summer squash but will still plant a couple of patty pan and crook neck.
This should be the year the blackberries take off. With a little luck we'll be making jam from our own berries this year.
The girls are already in full egg-laying mode, we're getting a dozen eggs every 2 days. We've been having a lot of egg white breakfasts!
Sunday, January 16, 2011
15 Free Minutes
Time to really get going on the garden! This week has been a lot like spring even though its barely mid-January. I've been working on pruning and mulching lately. Yesterday I cleared out a large area in the back yard that had been filled with rocks and pea gravel. The plan is to surround it with a chicken wire fence to protect it from the chickens and use it to try my hand at corn again.
Last season, it became obvious that the peach tree was affected by leaf curl. After reading from many sources and asking around it seemed the consensus was to spray the entire tree with copper sulfide. I hate to use anything on the plants but compost and DE but I really can't bear to lose my peach tree. Scott bought it form me shortly after we got married and it was the first thing that we planted together. So, I pruned it well and sprayed it down. I'm keeping my fingers crossed that this will keep it healthy.
One of my goals this year is to grow wheat. I have never grown wheat and I don't know anyone who has grown wheat, but it's really just a grass....right? We'll see how that goes!!
Last season, it became obvious that the peach tree was affected by leaf curl. After reading from many sources and asking around it seemed the consensus was to spray the entire tree with copper sulfide. I hate to use anything on the plants but compost and DE but I really can't bear to lose my peach tree. Scott bought it form me shortly after we got married and it was the first thing that we planted together. So, I pruned it well and sprayed it down. I'm keeping my fingers crossed that this will keep it healthy.
One of my goals this year is to grow wheat. I have never grown wheat and I don't know anyone who has grown wheat, but it's really just a grass....right? We'll see how that goes!!
Wednesday, April 28, 2010
8 Days A Week
Did I say that we took a vacation before the craziness of spring planting???
Every day, seedlings are ready to go out, ground is waiting to be cleared, squash need watering, beds need weeding, wigwams to be made. This is it!! Our long winter is over!!
Last week I cleared some ground in the front yard and set up a new bed. This week I planted eggplant and peas there. Still some room left, cucumbers maybe?
Near that, I planted out the corn seedlings, they are already a foot tall and growing fast. This is my first try at corn. I have read they are nitro-hungry so I'm stewing up some rabbit poo tea. Seamus keeps me in a steady supply of poo!!!
Behind the corn, I have 5 tomato plants. Last year, I tried companion planting with marigolds and it worked very well. I didn't have any pest problems on the tomatos so this year I planted even more marigolds. They are pretty too (which is good for the girls who would have the whole yard filled with flowers).
In the corner I put in an artichoke plant. They're not my favorite thing to eat, but the kids love them and so do the in-laws. Hopefully enough to share, if not this year then next year!! I am excited to have something that will produce year after year without having to be replanted every time.
Every day, seedlings are ready to go out, ground is waiting to be cleared, squash need watering, beds need weeding, wigwams to be made. This is it!! Our long winter is over!!
Last week I cleared some ground in the front yard and set up a new bed. This week I planted eggplant and peas there. Still some room left, cucumbers maybe?
Near that, I planted out the corn seedlings, they are already a foot tall and growing fast. This is my first try at corn. I have read they are nitro-hungry so I'm stewing up some rabbit poo tea. Seamus keeps me in a steady supply of poo!!!
Behind the corn, I have 5 tomato plants. Last year, I tried companion planting with marigolds and it worked very well. I didn't have any pest problems on the tomatos so this year I planted even more marigolds. They are pretty too (which is good for the girls who would have the whole yard filled with flowers).
In the corner I put in an artichoke plant. They're not my favorite thing to eat, but the kids love them and so do the in-laws. Hopefully enough to share, if not this year then next year!! I am excited to have something that will produce year after year without having to be replanted every time.
Saturday, April 17, 2010
Vacation!

We took a week off before the madness of spring planting to visit a couple of cities in the area. One of my favorite stops was the lovely and whimsical yarn store in Santa Rosa,  http://www.castawayyarn.com/yyarn.com/. The best part? Oooh, maybe the giant magpies nest in the front window, the tray of cupcake pincushions, the little dinghy right inside the front door, or perhaps the huge felted wool tornado complete with cows and other livestock!!
 http://www.castawayyarn.com/yyarn.com/. The best part? Oooh, maybe the giant magpies nest in the front window, the tray of cupcake pincushions, the little dinghy right inside the front door, or perhaps the huge felted wool tornado complete with cows and other livestock!!
The next best thing for me was our visit to the Luther Burbank Home and Gardens. For those of us who have never heard of Luther Burbank before, he was the great man who brought us (among other things) the Russet Potato! Thank you Mr. Burbank. He made his home in Santa Rosa and it has been maintained since his death by various entities and is currently owned by the city of Santa Rosa. I am envious of his home and grounds but most of all, I lust after his marvelous greenhouse complete with a FIREPLACE!!!! What more can you ask for? We were not allowed inside the greenhouse but I did peek inside the windows. It really is the most wonderful of its kind that I have had the privilege to see in person. It has renewed my hunger for a greenhouse of my own.
 been maintained since his death by various entities and is currently owned by the city of Santa Rosa. I am envious of his home and grounds but most of all, I lust after his marvelous greenhouse complete with a FIREPLACE!!!! What more can you ask for? We were not allowed inside the greenhouse but I did peek inside the windows. It really is the most wonderful of its kind that I have had the privilege to see in person. It has renewed my hunger for a greenhouse of my own.
We will always remember the time we spent in the Petrified Forest. We were definitely ready to get out of the car and the short (less than a mile) walk through the forest to view the petrified trees was just the ticket.

Something like 3 million years ago, a volcanic eruption felled giant and ancient redwood trees. They were buried in ash and over the millena petrified into rock. In the early 1900's, diggers worked to unearth these behemoths and they are still on display today. If you get the chance to visit a petrified forest, go!!! You will not be sorry you went.
After Santa Rosa, we headed south to Half Moon Bay. This is a town that I have spent lots of time in but never have I had the chance to stay over night. Usually we will go for a day trip and stay for a couple hours so we can be home in time to prepare dinner.

My in-laws very generously paid for our room in Half Moon Bay. We stayed in a wonderful hotel on the beach and spent a whole day out enjoying the ocean. Nights were spent in the jaccuzzi looking at stars and listening to the fog horn. We all had a blast but the girls had the most fun! Truly, all they need is a place with a swimming pool and they are satisfied but give them the beach and they're in heaven!

We try to visit the goat farm when we are in HMB.
Harley Goat Farm http://www.harleyfarms.com/ is a wonderful place for kids, adults, foodies, everybody who has a hunger for exploring and discovering local treasures.
We can buy some of their cheeses at our local Whole Foods market, but our favorite is the Ricotta which is only available at the shop. (I believe they will ship it to you as well).

Check out their website, they have a whole wall of awards and accolades to recommend them.
We had lots more stops on our trip. We were only gone for a week, but it feels like forever. Tomorrow, we are going to Full Cirlce Farm
Wednesday, July 8, 2009
Jam Making Day

 Monday was the first Jam Day of the year!! My darling family went to the farmers market and picked up a whole flat of beautiful, delicious, organic strawberries. Last year, I made strawberry, blackberry, plum, and peach jam. The plums and peaches were all home grown, and we buy our berries from the same farmer every year. Lucious!
That jam from last year was enough for us to give a few jars away to family and friends and its still feeding us now! I can't remember the last time we bought jam or jelly. It is such a blessing to be able to make and serve this to my family. Especially since it is something we use nearly every day. Mostly, we eat jam around here.
Jam, jelly and preserves are 3 different things. The main difference between jam and jelly is the straining. For jelly, you have to strain your fruit/jam through a cheesecloth to get out all the chunks of fruit. Jelly, therefore, is good for people who don't like seeds in their teeth. However, it takes a lot more time and effort. Not to mention the extra cost of buying the cheesecloth.
All things considered, I opt for jam. To make strawberry jam, you need only the fruit, pectin, sugar, lemon juice, butter and a saucepan. To can it, you will need a few more items. Here's the list of the essentials.
1. Jars. You will need a variety of sizes. I use the cute little jars for gifting but most of my jam goes into the pint sized jars. Quart jars are really more for preserving veggies and are too big for jam. Our family can easily consume the pint sized jars within a reasonable time after opening. The first time you buy jars, they come with all the lids and rings you will need. You can reuse the jars and rings as many times as you like, but you will need new lids every time. The jars need to be washed in hot hot hot water and kept hot until you are ready to fill them. I wash mine on the top rack of my dishwasher and then keep them in there with the door shut.
2. A large (really large!!) boiling pot with a removable rack and a lid. Before I bought my canning pot at the hardware store, I used my jumbo stew-pot with the steamer insert. The removable rack keeps the jars from sitting directly on the bottom of the pan or from bumping into each other. This is important because either one of those could cause your jars to crack. Thereby wasting both your jars and the jam!
3. A large mouth funnel. This makes life much easier. These funnels are found in the same aisle as the rest of your canning equipment. They're made just for this purpose and fit perfectly inside the mouth of the jar. A bonus is that you can use it to measure 1/4 inch from the top of the jar. This is called "headspace" and is the max that you want to fill your jars to reduce discoloration and spoilage.
4. A jar lifter. This handy tool looks a lot like spaghetti tongs but its made to grasp jars. The first time I made jam, I tried to use tongs to lift the hot jars out of the boiling water. That was a bad idea!! Several times I lost grip on the jars and they splashed back down into the water. Pretty dangerous, especially if you have little ones running around.
5. A large saucepan or stock pot. You want a tall pot! The boiling fruit and sugar is like lava. You don't want this to boil over and you especially don't want this on your skin or clothes.
6. A smaller saucepan. Here, you will keep your clean bands and lids hot (but not boiling) until you are ready to use them. They sell plastic magnetic "wands" for lifting your lids out but really all you need is a pair of tongs. They work fine for this. It is important to heat your lids because this softens up the sealing compound that is found around the edges. It will get a better seal after being heated and softened.
7. Have plenty of towels around. You will need one laid out to put your clean, hot jars on for filling with your jam. They need to rest about 24 hours after filled in order to seal and "set" (gel). Put them in a place where they won't be in the way.
For about 8-10 jars of jam, you will need these ingredients.
5.5 cups crushed or diced strawberries (about a whole flat will equal 5.5 cups)
1/4 cup lemon juice
1/2 tsp butter
7 cups sugar
1 package fruit pectin
You start with about a flat of strawberries. Wash them up, cut off the stems, leaves, and any parts that look spoiled. Just like any other cooking, the freshness of your ingredients makes all the difference! You need to smash them up pretty good. If you like your jam chunky, leave the chunks bigger. A pastry blender or potato masher works good for this. But you can just dice them up with your knife, too.
Go ahead and fill your water-bath canner half full with water and set to high on the stove. You want this to be ready so your filled jars can go right in. Also, measure out all your ingredients so they are ready to go in, once your fruit get to boiling, you wont have time to stop and measure out 7 cups of sugar!
After you have your berries all mashed up, pour them into your large pot on the stove and add your lemon juice and pectin. Make sure your pectin gets stirred in real good, you can pour it in slowly. The butter/margarine is supposed to help keep your jam from foaming (which is a pain in the ass cause you have to skim all that crud off). I've never done it without the butter, so I don't know if it helps or not. I'd rather just use it and not find out if it is worse without it. I get enough foam as it is.
Bring all this to a full boil and add your sugar all at once. Stir it until its all dissolved and keep stirring, you want it to come up to a rolling boil and boil it like this while your stirring it for a full minute. I wear an oven mitt during this step, the jam is bubbling and steam is rising. Better safe than sorry!
Take it off the heat and skim off the foam. The foam isn't dangerous but you don't want it in your canning jars. It makes people nervous to open a jar of homemade home canned jam and see a bunch of foamy bubbles on top. I usually put all the scraped foam into a saucer and use it at dinner that same day.
Once you've got all the foam off you can start ladling your jam into your jars. Make sure your jars don't have any cracks or imperfections. You've spent a lot of time and put a lot of work on this, a cracked jar can "explode" during the ladling or canning process and ruin your whole batch!
Set your jars out on your towel and put the canning funnel into the first jar. Start ladling in your beautiful jam. Leave head space about 1/4 inch. I usually use the bottom of the funnel as a guideline...don't go past it. After filling your jars, clean off the rims. Make sure nothing is on there or you wont get a seal. Worse yet, you could get spoilage.
Now you've got all your jam in the jars, lift the lids and rings out of the simmering water and finger tighten the rings onto your jars. You don't want it too tight because air has to escape during the canning process.
Using your jar lifter, lower the jars into the boiling water. The water needs to cover each lid by 2 inches. Boil in the water 10-15 minutes. Remove and set them on the towel. They should be left alone for about 24 hours. You should hear a lovely "ping" sound, one for each lid, to let you know the seal is set. After they have cooled and set overnight, test the lid for a seal and clean the jars. Label each with the date and contents and get ready for your next batch of canning!
Wednesday, July 1, 2009
Cantelope!
Success! Not to celebrate prematurely, but today I found at least 6 grapefruit sized cantelope on the vines!!

Keep your fingers crossed! We will be enjoying these come the heat in August.
I am putting the pumpkin starts in the ground tomorrow. The will have thier own giant patch of the front garden so they will be free to spread. I don't want them to feel inhibited.
Sunday, June 28, 2009
Cantelope?
Wow. I thought this year, I would plant a couple of cantelope and see how it went. So far, the vines have spread out almost 10 feet around the plants. I'm starting to worry!! Does this mean all leaves and no fruit?
I harvested the garlic this week. Five georgeous bulbs of elephant garlic. Giant and beautiful. I planted one whole bulb of garlic, 5 cloves, and was able to harvest all of it. I will definitly plant more this winter. It requires a quite a lot of grow time, but it feels almost miraculous. Plant a clove and reap a bulb!!
The bulbs are curing now on the drying rack in the garage. Wow, any time we open the door to do laundry, the smell of garlic pours into the house. I love it!
I bought the origional elephant garlic from one of my favorite farmers at the Urban Village Farmers Market in Campbell. She was very informative and shared lots of good information. Such as garlic from the grocery store will often be engineered to keep it from growing. What must be done to a seed to keep it from doing the thing that it is created to do?
I harvested the garlic this week. Five georgeous bulbs of elephant garlic. Giant and beautiful. I planted one whole bulb of garlic, 5 cloves, and was able to harvest all of it. I will definitly plant more this winter. It requires a quite a lot of grow time, but it feels almost miraculous. Plant a clove and reap a bulb!!
The bulbs are curing now on the drying rack in the garage. Wow, any time we open the door to do laundry, the smell of garlic pours into the house. I love it!
I bought the origional elephant garlic from one of my favorite farmers at the Urban Village Farmers Market in Campbell. She was very informative and shared lots of good information. Such as garlic from the grocery store will often be engineered to keep it from growing. What must be done to a seed to keep it from doing the thing that it is created to do?
Saturday, June 20, 2009
Jeeez! It's My Birthday!

I've got a bit of catching up to do!
Seamus has been "blowing his coat" which is really just a fancy way to say hes shedding all over the place. I've picked, plucked, combed quite a collection of beautiful angora wool from him over the last week. He's still got lots left on him ready to come off. I will be working on this for another week at least.
The chickens are freaked out. Something is eating their eggs before I can get them. Which makes them lay somewhere else, which means I have to hunt them down, which means we havn't been getting eggs lately, which makes me want to get a giant trap and set it up to catch whatever is EATING MY EGGS!!
The garden is still steadily producing. I started a whole new bunch of seeds a few weeks ago and they are all starting to go in to the ground. Beans, squash, turnips, radishes, arugula, cantelope. I am also trying my hand at cilantro, parsley, hollyhocks, bee balm, and japanese maple.
Japanese maple?? Hey, these things go for big bucks!! We have a beautiful and healthy maple in the back yard that is producing seeds. I'm trying to start a few and with a little luck, in a couple of years we'll have several small trees that we can sell.
We're also potting some Sago "palm" pups. These are another popular but expensive tree. Wether it works or not, we'll see!!
I've taken some of the back yard over for more veggies. The chickens still have the majority of the room, but I'm now able to grow more of what I wanted this year. So far I've planted some herbs and beans (from last years seeds). Today I put in 2 tomato plants.
I must be one of the few people in the world who can't grow tomatoes. I try every year and every year I get a few puny little tomatoes. They taste spectacular!!! But there just aren't enough of them. Ahhh. Maybe this year will be different.
Tomorrow is my birthday!! I was able to get the day off and we are going to the farmers market in the morning and then breakfast with the in-laws. It also happens to be fathers day so we'll all be able to celebrate the day together.
Seamus has been "blowing his coat" which is really just a fancy way to say hes shedding all over the place. I've picked, plucked, combed quite a collection of beautiful angora wool from him over the last week. He's still got lots left on him ready to come off. I will be working on this for another week at least.
The chickens are freaked out. Something is eating their eggs before I can get them. Which makes them lay somewhere else, which means I have to hunt them down, which means we havn't been getting eggs lately, which makes me want to get a giant trap and set it up to catch whatever is EATING MY EGGS!!
The garden is still steadily producing. I started a whole new bunch of seeds a few weeks ago and they are all starting to go in to the ground. Beans, squash, turnips, radishes, arugula, cantelope. I am also trying my hand at cilantro, parsley, hollyhocks, bee balm, and japanese maple.
Japanese maple?? Hey, these things go for big bucks!! We have a beautiful and healthy maple in the back yard that is producing seeds. I'm trying to start a few and with a little luck, in a couple of years we'll have several small trees that we can sell.
We're also potting some Sago "palm" pups. These are another popular but expensive tree. Wether it works or not, we'll see!!
I've taken some of the back yard over for more veggies. The chickens still have the majority of the room, but I'm now able to grow more of what I wanted this year. So far I've planted some herbs and beans (from last years seeds). Today I put in 2 tomato plants.
I must be one of the few people in the world who can't grow tomatoes. I try every year and every year I get a few puny little tomatoes. They taste spectacular!!! But there just aren't enough of them. Ahhh. Maybe this year will be different.
Tomorrow is my birthday!! I was able to get the day off and we are going to the farmers market in the morning and then breakfast with the in-laws. It also happens to be fathers day so we'll all be able to celebrate the day together.
Monday, May 25, 2009
More For The Garden
Ahhh what a day!! After the farmers market we went by the nursery. "Just to look" I told myself. Well I found plenty to look at and we now have several more veggies in the garden.
Today I planted eggplant, pepporcini, cantelope and basil. I also divided my aloe and replanted all the "babies" into pots. We now have 6 aloe plants. Can you guess what I'll be giving as gifts this year??
Scott has gotten excited about the prospect of growing more sago palms from the tiny ones that shoot out from the trunk of our existing palm. At the nursery we got organic "sure start" (which seems to be just a turbo charged fertilizer). I prised off a couple of the mini-sagos and Scott set about potting them. Well see how it goes.
Today I planted eggplant, pepporcini, cantelope and basil. I also divided my aloe and replanted all the "babies" into pots. We now have 6 aloe plants. Can you guess what I'll be giving as gifts this year??
Scott has gotten excited about the prospect of growing more sago palms from the tiny ones that shoot out from the trunk of our existing palm. At the nursery we got organic "sure start" (which seems to be just a turbo charged fertilizer). I prised off a couple of the mini-sagos and Scott set about potting them. Well see how it goes.
Our Daily Bread

At last! I have successfully made BREAD!!! I have unsuccessfully made bread many many times. Ooooooooh!!! I am extremely impressed with myself.
If you have never attempted bread making before, let me tell you the first thing you need to know. CLEAR YOUR SCHEDULE. Every time I have made bread, whether the results be good or bad, it was an all day engagement.

- First you assemble and mix all the ingredients (20 min).
- After mixing the initial ingredients, you let the dough sit until it becomes "big and bubbly" (30 min)
- Then you knead in even more flour (15 min).
- Next, you put your gorgeous and slightly sticky dough into a greased bowl, cover it with a cup towel and let it "rise". This is an unexact amount of time. The dough needs to double in size. Todays dough took about (1.5 hours).
- After the dough is sufficiently......doughy, you "punch" it down and divide it into the correct number of loaves. Today, I made 3.
- Now, you place each loave into its own greased pan and allow it to rise AGAIN. (30 min).
Then, at last, the dough is ready to become bread!! Put your loaves into the oven and soon (another 30 min) you have beautiful, fresh, wholesome, delicious, preservative-free, home made bread. 
Wow, imagine how much longer this would take if I had to grind my own flour.
Monday, May 18, 2009
Holy Moley!
Heat wave! California weather is so mild, all of a sudden we've got 100 degree weather.
My chickens are pissed and poor Seamus Fuzzworth is just laying around trying to stay cool. Looks like its time to shave the bunny. Hee Hee Hee. That sounds a bit dirty. I like it!
My chickens are pissed and poor Seamus Fuzzworth is just laying around trying to stay cool. Looks like its time to shave the bunny. Hee Hee Hee. That sounds a bit dirty. I like it!
Wednesday, May 13, 2009
Garden Rewards
Here are some tiny strawberries. Every day, there are more ready to be picked.


I feel like I havn't planted enough. Ahhh! This weekend, I'm digging up a new patch in the front yard to put out more broccoli lettuce and cabbage. The chard is looking rough (going to seed) so I should probably sow some more seeds and replace the older plants. What is the lifespan of a chard anyway.


I need more space!! I've planted most of what I want to grow this year, but still need at least another bed to get everything I want. I am toying with the idea of doing an in ground planting. I know, what a revolutionary I am that I would consider forgoing the raised bed and plant directly in the ground!!
We're already picking snap peas, strawberries, and onions from the garden! The strawberries were planted last year and didn't do much. This year, we've already got a small bushels worth. Apparantly strawberries take a while to produce.
We bought an apple tree last weekend. Its formed to grow laterally, ( I'm pretty sure the term is espalier ) and has a couple of tiny little apples on it already. Well see if they come to anything. It's still in the pot while I decide where to plant it. I have a couple of places I think it will do well, but I'm deliberating.
The chickens are doing well. Laying has been kicked into overdrive and we are overflowing with eggs. It's the best thing to watch the chickens come running around the corner when they hear the back door open! They know I've got something good for them. Their favorites are black sunflower seeds, chard from the garden, and the girls leftover cereal! We had a scavenger problem over winter, something was getting to the eggs and eating them all up! The hens all took to laying in strange spots and it was like an easter egg hunt every day! I've finally got them laying in the coop again, but they wont go in the boxes. Instead they lay in a secluded corner full of hay and feathers. At least I know where to find them!
Seamus the bunny. Ahhh Seamus. He's a bit anti social. I can't really blame him, the girls like to dress him up in baby clothes and that cant be fun for him. His wool really is lovely, though. He's gotten a couple of haircuts now and the angora is soft, warm, and lofty. When we are home, he has full run of the backroom and has great fun in the girls doll house, where he likes to hide. I plan on listing the wool in little batches on ETSY and seeing if it will sell at all. Who knows!
My birthday is coming up and I have a new tatttoo planned. I'll see if I can rustle up a drawing of what I want and post it here. Then, after I get it I'll take pics and put them up. I'm going to try 0ut a new artist and will be meeting him on Monday to go over what I want. I know it will include yarn, needles, siscors, and maybe a pin cushion. If you search Knit Tattoos on Flickr you will see some wonderful crafty tattoos!
We're already picking snap peas, strawberries, and onions from the garden! The strawberries were planted last year and didn't do much. This year, we've already got a small bushels worth. Apparantly strawberries take a while to produce.
We bought an apple tree last weekend. Its formed to grow laterally, ( I'm pretty sure the term is espalier ) and has a couple of tiny little apples on it already. Well see if they come to anything. It's still in the pot while I decide where to plant it. I have a couple of places I think it will do well, but I'm deliberating.
The chickens are doing well. Laying has been kicked into overdrive and we are overflowing with eggs. It's the best thing to watch the chickens come running around the corner when they hear the back door open! They know I've got something good for them. Their favorites are black sunflower seeds, chard from the garden, and the girls leftover cereal! We had a scavenger problem over winter, something was getting to the eggs and eating them all up! The hens all took to laying in strange spots and it was like an easter egg hunt every day! I've finally got them laying in the coop again, but they wont go in the boxes. Instead they lay in a secluded corner full of hay and feathers. At least I know where to find them!
Seamus the bunny. Ahhh Seamus. He's a bit anti social. I can't really blame him, the girls like to dress him up in baby clothes and that cant be fun for him. His wool really is lovely, though. He's gotten a couple of haircuts now and the angora is soft, warm, and lofty. When we are home, he has full run of the backroom and has great fun in the girls doll house, where he likes to hide. I plan on listing the wool in little batches on ETSY and seeing if it will sell at all. Who knows!
My birthday is coming up and I have a new tatttoo planned. I'll see if I can rustle up a drawing of what I want and post it here. Then, after I get it I'll take pics and put them up. I'm going to try 0ut a new artist and will be meeting him on Monday to go over what I want. I know it will include yarn, needles, siscors, and maybe a pin cushion. If you search Knit Tattoos on Flickr you will see some wonderful crafty tattoos!
Thursday, April 2, 2009
SPRING!!
Yeah! It is officially Spring!
There's lot of cleanup to do after a messy, rainy winter. On Sunday, I cleaned out the chicken coop and put in fresh litter. I also pruned back the (very overgrown) orange and lemon trees. This yielded quite a bit of fresh fruit that I took to work for all the girls to take home. It was gone that same day!
The fireplace is full of ash that needs to be cleaned out... I've been told not to add wood ash to my compost pile so I'm not sure what to do with it. I don't like the idea of putting it in the trash. It can wait a couple more weeks till I figure it out.
Weeds Weeds Weeds! I am determined to be organic, so spraying the weeds is out of the question. That leaves it to me and my two hands!Weeding is not hard work really, just boring!
We have aquired a male English Angora rabbit (for the wool don't you know!) He's adorable and fluffy and semi-affectionate. We call him Seamus Fuzzworth and he's a dream.
This year, I'm trying a couple of new veggies in the garden. Brussel sprouts, broccoli, Japanese cucumber, edamame (soy beans), and crook neck squash. The patty pan squash last year was delicious and I'm going to plant that again. Last years strawberries are going strong and already setting fruit so we should get lots of those this summer!!
The jam I made last summer has lasted us all winter and there's still more! This year I will make more strawberry, though. It is the girls favorite. The peach jam is the favorite of the rest of the family, hopefully, the peach tree will give as much this year as it did last year.
Egg production is picking back up. We are holding steady at 3 hens. I will be looking for either 3 more this summer, or possibly ducks. We visited Harly Farm (a goat farm in Pescadero) and they were selling duck eggs. They were gigantic and beautiful and selling for $3 EACH!!! That may be something to try! On our next visit we'll pick the duck egg rather than the fudge. Ducks and chickens apparantly get along well, but need to be provided a small pool. I understand some breeds will be happy with a childs plastic pool. How exciting!!
There's lot of cleanup to do after a messy, rainy winter. On Sunday, I cleaned out the chicken coop and put in fresh litter. I also pruned back the (very overgrown) orange and lemon trees. This yielded quite a bit of fresh fruit that I took to work for all the girls to take home. It was gone that same day!
The fireplace is full of ash that needs to be cleaned out... I've been told not to add wood ash to my compost pile so I'm not sure what to do with it. I don't like the idea of putting it in the trash. It can wait a couple more weeks till I figure it out.
Weeds Weeds Weeds! I am determined to be organic, so spraying the weeds is out of the question. That leaves it to me and my two hands!Weeding is not hard work really, just boring!
We have aquired a male English Angora rabbit (for the wool don't you know!) He's adorable and fluffy and semi-affectionate. We call him Seamus Fuzzworth and he's a dream.
This year, I'm trying a couple of new veggies in the garden. Brussel sprouts, broccoli, Japanese cucumber, edamame (soy beans), and crook neck squash. The patty pan squash last year was delicious and I'm going to plant that again. Last years strawberries are going strong and already setting fruit so we should get lots of those this summer!!
The jam I made last summer has lasted us all winter and there's still more! This year I will make more strawberry, though. It is the girls favorite. The peach jam is the favorite of the rest of the family, hopefully, the peach tree will give as much this year as it did last year.
Egg production is picking back up. We are holding steady at 3 hens. I will be looking for either 3 more this summer, or possibly ducks. We visited Harly Farm (a goat farm in Pescadero) and they were selling duck eggs. They were gigantic and beautiful and selling for $3 EACH!!! That may be something to try! On our next visit we'll pick the duck egg rather than the fudge. Ducks and chickens apparantly get along well, but need to be provided a small pool. I understand some breeds will be happy with a childs plastic pool. How exciting!!
Friday, August 29, 2008
Catch Up
Has it been 4 months?? Let me tell you what has been going on.
For years, I have been "planning" to keep chickens. At long last, everything fell into place about 2 months ago. In my ongoing mission to buy locally, I took the girls to our local feed store. Now this feed store is about 10 minutes from my house and 2 minutes from my LYS (local yarn store). However, we had never been there. From the road, it isn't that inviting. The window display is old and dusty, giving the store an abandoned store-front look. What a suprise I found inside!
Sam's is a fully stocked, well staffed, thriving local business and I want to spit for letting myself be put off. The day we chose to go, I had already gotten the house ready for chickens! I figured if Sam's didn't have chicks, we'd drive up to HMB and pick some up there. After asking at the counter, it was confirmed that chicks were only available in the spring. Well, so much for buying local. HMB, here we come.
Time for a trip to the bathroom before our long car drive... do you have a 5 year old? Have you ever had one? If not, then you can't truyly appreciate how long their bathroom breaks are. But thank goodness for it today! While we had been in the bathroom a woman had called trying to get rid of her chickens!! What luck! What timing!! There was no more "planning". This was it!
Two months later, we have gone from 4 chickens, to 3 chickens, and now we are 6 chickens strong! We lost one of our origional chickens to Mareks disease. Mareks is extremely commen and utterly contagious among birds! It pays to buy your chickens from someone who can assure you they have been vacinatted. Our "free" chickens have turned out to cost us quite a bit in vet fees. Luckily, the chicken who died was the one that was causing us a bit of trouble. In case there is any doubt, a hen WILL begin to act like a rooster if there isn't a rooster around. And that includes crowing!
To replace our fallen soldier, we drove to Cotati (NOT local for those of you keeping track) to meet Joan The Chicken Queen. Yes, that's what she's called. Look her up on Craigs List.
Joan was no nonsense. Before I had the boxes open and turned around she had already wrangled one chicken and enlisted my oldest to grab another. So much for all my prepatory reading about picking a hen. Joan had the chickens in the box before I could say "Four-point examination". I didn't even get to check their "vents" and I was sooo looking forward to gauging the space between the pubic bones. Really, I had done my homework and was ready to put it to use. Not to worry, though. These new hens have proven to be excellent (almost daily) layers of beautiful large brown eggs. I've gotten several with double yolks. Thank you, Joan! You are a Queen!
All these new chickens mean more eggs.....and more poop. Now, instead of waking at the crack of dawn, opening the coop door, crawling back to sleep. I wake at the crack of dawn, open the coop door, pick chard and weeds from the front garden to feed/distract the hens, then go about "harvesting" poop.
A word about chicken manure. You can buy it by bagfuls at the local garden center, its supposed to work wonders on your vegetable garden. I look forward to using it as a totally natural, completely local, 100% free compost on next years garden. Chicken manure can't be put straight onto your beds though, it will "burn" the plants. So you have to let it "rot". Rotting manure is just as much fun as it sounds.
The chickens have really added a lot to our family. They are a wonderful source of entertainment and remarkably low mantinence ( I know I said crack of dawn but its really more like 6:30). The poops not that bad and think of the huge payoff! Keeping chickens is a really good first step for us to eat, live, and think locally. My children are getting hands on experience with where their food comes from and the work that it involves. I am getting the satisfaction of cooking and sharing food that I can feel 100% good about.
The next post, I'll tell you about our reclaimed front yard and the garden we have started there!
For years, I have been "planning" to keep chickens. At long last, everything fell into place about 2 months ago. In my ongoing mission to buy locally, I took the girls to our local feed store. Now this feed store is about 10 minutes from my house and 2 minutes from my LYS (local yarn store). However, we had never been there. From the road, it isn't that inviting. The window display is old and dusty, giving the store an abandoned store-front look. What a suprise I found inside!
Sam's is a fully stocked, well staffed, thriving local business and I want to spit for letting myself be put off. The day we chose to go, I had already gotten the house ready for chickens! I figured if Sam's didn't have chicks, we'd drive up to HMB and pick some up there. After asking at the counter, it was confirmed that chicks were only available in the spring. Well, so much for buying local. HMB, here we come.
Time for a trip to the bathroom before our long car drive... do you have a 5 year old? Have you ever had one? If not, then you can't truyly appreciate how long their bathroom breaks are. But thank goodness for it today! While we had been in the bathroom a woman had called trying to get rid of her chickens!! What luck! What timing!! There was no more "planning". This was it!
Two months later, we have gone from 4 chickens, to 3 chickens, and now we are 6 chickens strong! We lost one of our origional chickens to Mareks disease. Mareks is extremely commen and utterly contagious among birds! It pays to buy your chickens from someone who can assure you they have been vacinatted. Our "free" chickens have turned out to cost us quite a bit in vet fees. Luckily, the chicken who died was the one that was causing us a bit of trouble. In case there is any doubt, a hen WILL begin to act like a rooster if there isn't a rooster around. And that includes crowing!
To replace our fallen soldier, we drove to Cotati (NOT local for those of you keeping track) to meet Joan The Chicken Queen. Yes, that's what she's called. Look her up on Craigs List.
Joan was no nonsense. Before I had the boxes open and turned around she had already wrangled one chicken and enlisted my oldest to grab another. So much for all my prepatory reading about picking a hen. Joan had the chickens in the box before I could say "Four-point examination". I didn't even get to check their "vents" and I was sooo looking forward to gauging the space between the pubic bones. Really, I had done my homework and was ready to put it to use. Not to worry, though. These new hens have proven to be excellent (almost daily) layers of beautiful large brown eggs. I've gotten several with double yolks. Thank you, Joan! You are a Queen!
All these new chickens mean more eggs.....and more poop. Now, instead of waking at the crack of dawn, opening the coop door, crawling back to sleep. I wake at the crack of dawn, open the coop door, pick chard and weeds from the front garden to feed/distract the hens, then go about "harvesting" poop.
A word about chicken manure. You can buy it by bagfuls at the local garden center, its supposed to work wonders on your vegetable garden. I look forward to using it as a totally natural, completely local, 100% free compost on next years garden. Chicken manure can't be put straight onto your beds though, it will "burn" the plants. So you have to let it "rot". Rotting manure is just as much fun as it sounds.
The chickens have really added a lot to our family. They are a wonderful source of entertainment and remarkably low mantinence ( I know I said crack of dawn but its really more like 6:30). The poops not that bad and think of the huge payoff! Keeping chickens is a really good first step for us to eat, live, and think locally. My children are getting hands on experience with where their food comes from and the work that it involves. I am getting the satisfaction of cooking and sharing food that I can feel 100% good about.
The next post, I'll tell you about our reclaimed front yard and the garden we have started there!
Monday, May 26, 2008
The Baby Sweater
Ahhh! I finished the "Baseball Tee" from Knit 2 Together for my boss. Done done done done done! Did I get a picture of it? Noooo! Wonder if she'll bring it back and let me snap a couple!
Subscribe to:
Posts (Atom)